Tuesday, August 31, 2010

Icecream Container . . and . . Mug Pouch?!

I mentioned two posts ago about the Re-Invention challenge by Jenny of ELEFANTZ. I can now show you what I did with the icecream container.

A few years back I saw the pattern for a mug pouch, by Christine Book, in the Australian HOMESPUN magazine No. 38 (Vol. 7 No.4). I wanted to make one then, but never did. Recently our patchwork group decided, as it’s growing “too big”!!! and to make it easier on the hostess, where we meet once a month, it was suggested to bring our own mug along. I knew exactly what I wanted to make, to take along my mug with.

I also made a couple of others for friends in the group also. So I’m using the last one I made, as the model for the process of making it and how the icecream container came in useful. I tried something new – colouring in with pencils the stitchery, painting over it with Textile Medium and iron setting it.

1. The pouch is made in two pieces, like mini quilts. With some embroidered pockets. One goes on the back for a teaspoon, and the teabags plus sugar.


2. It’s folded in a certain way, which makes sense soon…!!!


3. Embroidery completed, which I did as Crazy Quilting, as my friend loves CQ! Also a piece of icecream container. What’s if for? It will sit in the bottom of the pouch to hold the base out. I used it because I didn’t have any template plastic like the instructions suggested.


4. The pockets have been sewn on the front and the back, and now the two pieces are hand sewn together, to form the pouch.


5. The completed pouch!!!


6. Here are the three I made. The rose one is mine.


7. The back of my pouch, showing what the "spoon" pocket looks like.


Saturday, August 28, 2010

Gorgeous giveaway

Gerry at olderrose is having a gorgeous giveaway.

Here are the details:


PRIZE # 1.... One of Gerry's "Rise Above it All" pincushions.... This one is blue velvet and lavishly embellished with a vintage brooch and beads, jewels and trims....... plus a tiny locket... It is 8" tall with a weighted silver base. It will never get lost in your stash.


PRIZE #2..... Keeping with the blue theme, a trio of bluebirds hand-painted by Gerry... Since these are antique mother-of-pearl buttons they are especially luminous and reflect every light source in the room..... thus are very difficult to photograph.. They are only 1" in diameter and have a metal shank in back... Although difficult to tell in the photo they are edged with gold...
Stunningly beautiful and I would love to win, sadly my name never gets a drawn in giveaways. But I will try!!!

Thursday, August 26, 2010

Re-Invention Challenge

Jenny of ELEFANTZ has a Re-Invention challenge this month. I've continued to re-use a couple of denim jeans (which was Jenny's challenge a couple of months ago).....but I've also re-purposed an icecream container!!!

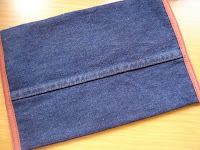
Firstly here is what is left of one pair of jeans!!!


In the previous post I've shown the bag I made from these jeans. I've since made a "remote control" pouch/pocket for my hubby as well!! I unpicked different seams to end up with workable pieces. For the control pouch, I retained both pockets intact, and added extra denim between each pocket to be the part that hung over the arm rest.


Secondly, here is what is left of the re-purposed icecream container!!!


I've made a "mug pouch" for myself and also for a couple of friends, which I'll blog about next time. However, it required some templastic, cut out to fit the bottom of the pouch, to hold the shape. I didn't have any, so I thought, I know what I can use....the sides of an icecream container....and it worked very well!!

THE OTHER PAIR OF RE-CYCLED JEANS
I made a "masculine" cover for my hubby's new iPad, from the other pair of jeans, shown in the previous post. Well "masculine" now meets "feminie"!!! A Kindle cover for me!!!


A gorgeous pattern from Moda's Bake shop...the...Bookkeeper Cover.


Thursday, August 12, 2010

Re-cycled Denim Jean projects

More projects for Item 2, on my 52MMMC list – using re-cycled jeans.

I made a “masculine” cover, using left over denim from the first pair I’d been cutting up, for my husbands new iPad. These jeans had top stitching already done in medium brown thread, so I continued that theme, top stitching where I could. I had some old plain brown fabric that matched well, to use as the lining and binding. I finished off by top stitching the brown binding in dark blue thread.


A great find in a second-hand shop some weeks back were jeans going at a $1 each. I picked out a pair where the denim was still a very nice dark colour. It also had a light blue cording set into the side seams. I made another bag this time working out the pattern as I went, with knowledge gained from the Make-A-Bag-Sew-Along.

I didn’t want to undo the seams where the blue cording was so that was left complete and I then sewed in a centre panel of fabric. This fabric is a Windham Fabric line “Sally Rose” ca. 1845-1865.

To make the bag base for making the box shape and to have enough denim, I had to sew a couple of pieces together, then set this in a bit as the “jean leg” panel flared out a bit as it went down to the base of the bag.

I wanted to be able to close my bag with a zip, and spent hours trying to figure it out thinking of the toiletry pouch and gathered clutch I’d previously made. But I had help from a fellow scquilter (Southern Cross Quilter's yahoo group) who pointed me in the direction of “how to insert a concealed top edge bag zipper”.


So I was able to accomplish this. Although in the tutorial she took the zip apart, I didn’t do that, just carefully made and sewed the fabric casing each side of the zip and achieved the same result.


I made denim straps using what long length I could cut from the left over jeans, which were 20 inches x 3 ¼ inches. I folded the denim in half and pressed in a ¼ seam down each length and top stitched these seams together, then a line of top stitching on the fold, to have a nice finish.

I cut the selvedge off with the fabric name on it and made a loop that I caught up in the lining seams to attach keys too.


I have really enjoyed these projects, loving the look and feel of the denim.

Make A Bag Sew Along - finished

Item 3 on my 52MMMC list – is now completely complete!! I made the last two items for this set in the Make-A-Bag-Sew-Along, which were the sun-glasses case plus the bits-and-pieces pouch.

The complete set is made up of the tote, toiletries pouch, mini make-up roll, sun-glasses case and bits-and-pieces pouch.

* - * - * - * - *

The Biscornu in my previous post – I had some one ask, “what is a biscornu?” This link gives the definition and how to make one.

Tuesday, August 3, 2010

52MMMC - Part 2

Two posts ago I mentioned this challenge.

I’ve made a few more slow-cooker dishes, back on July 7th. So here are some photo’s to tempt you!!

A Moroccan Beef with Kumara and Sultana’s. It had a cinnamon stick cooking in it also, which you can see on the top.


Plus for dessert Chocolate self-saucing pudding.


Three weeks ago I had family over for Sunday lunch. I prepared some of the meal on Saturday, but on Sunday had the dessert cooking in the slow-cooker, while we were all at church. The dessert was Blackberry cobbler….all very yummy, once again!!!

+ - + - + - + - +

While away a couple of weeks ago with my daughter, I visited Janine Smith's shop Colour Down Under. She has a cross-stitch class for newbies, and anyone else that wants to join in, on Wednesday mornings. I took a friends two eldest daughter’s along, while my daughter stayed with my friend and her other girls.

The group are working on a biscornu. A free pattern, Traditional Bulgarian Motif, which is quite simple and lovely in all sorts of colourways. Here is my version of it.


12. Make a biscornu. Completed July 26th.


13. Learning tatting.